If you’re searching for clear, science-backed guidance on beauty concepts, makeup techniques, and skincare, you’re in the right place. This article is designed to cut through trends and misinformation to give you practical, expert-informed advice you can actually use. Whether you want to master basic makeup tools, understand how skincare ingredients work, or refine your personal styling approach, you’ll find straightforward explanations rooted in proven techniques and cosmetic science.
Many beauty resources focus on hype rather than results. Here, the goal is different: to explain not just what to use, but why it works and how to apply it effectively. Drawing from established skincare research, professional makeup artistry principles, and real-world application methods, this guide helps you build confidence in your routine.
By the end, you’ll have a clearer understanding of product selection, technique refinement, and how to create a polished look that enhances your natural features—without guesswork or overwhelming jargon.
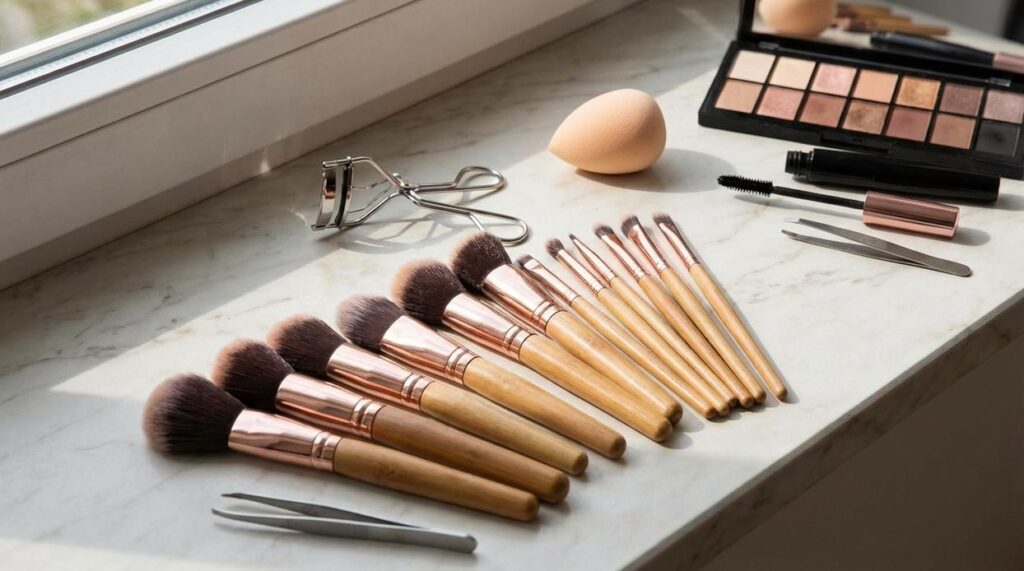
The Canvas: Essential Tools for a Flawless Base
I still remember the first time I ditched my fingers for a proper foundation brush. The difference was immediate (and slightly humbling). What I thought looked “blended” before suddenly looked streaky in comparison.
Flawless Base Matters
The Foundation Brush
A flat paddle brush is the traditional tool: it paints product onto the skin in smooth strokes, offering fuller coverage and precision around the nose and jaw. A dense kabuki-style brush, the modern favorite, buffs foundation in circular motions for an airbrushed finish. Because the bristles are tightly packed, they diffuse product evenly. A dedicated brush gives far more control than fingers, which can absorb product and leave uneven patches (plus, fingers can transfer oils).
The Beauty Sponge
The beauty sponge excels at pressing product into the skin for a seamless, natural finish. The key step: use it damp. When wet and squeezed out, it expands and prevents excess absorption, allowing foundation to sit on the skin rather than disappear into the sponge. For foundation, bounce it lightly. For concealer, tap precisely under the eyes. For cream blush, press and roll to keep pigment vibrant yet blended.
The Concealer Brush
A small, precise brush is essential for targeting blemishes. Instead of wiping product away, pat concealer directly over spots to build coverage gradually. It’s also perfect for carving out eyebrows or sharpening lipstick lines (a backstage trick I swear by). Pro tip: use a tiny tapping motion and let the product set before blending edges.
The Windows to the Soul: Must-Have Eye Makeup Brushes
First and foremost, if you buy only one eye brush, make it the fluffy blending brush. Its soft, tapered bristles are designed to diffuse pigment in the crease—the natural fold above your eyelid—so color fades seamlessly rather than stopping in a harsh stripe. Using light pressure, sweep the brush back and forth in small “windshield wiper” motions. Then, switch to tiny circular buffing movements to soften edges even further. Many tutorials stop there, but here’s what they miss: the angle of your handle matters. Tilt it slightly upward to avoid dragging product too low (trust me, this prevents accidental raccoon eyes).
Next, consider the flat shader brush, which does the opposite job. Unlike the airy blending brush, this one is dense and flat, built to pack pigment onto the lid for maximum color payoff. Press—don’t swipe—the brush onto your eyelid to intensify shimmer or metallic shades. According to cosmetic formulation research, pressing reduces fallout and improves adherence of pressed powders (Source: Journal of Cosmetic Science). In short, this is your color amplifier.
Finally, the angled liner/brow brush earns its place through versatility. Its stiff, slanted bristles create crisp wings with gel or powder liner. The same edge can mimic hairlike strokes in sparse brows. While some argue specialty brushes outperform multitaskers, precision often comes down to technique, not tool count. Even with basic makeup tools, mastery beats excess (less clutter, more control). For additional blending techniques, see this expert guide: https://www.allure.com/story/how-to-blend-eyeshadow.
The Finishing Touches: Tools for Powder, Color, and Definition
When your base is complete, the right tools make the difference between “polished” and “patchy.” These basic makeup tools help lock everything in while adding shape and glow.
1. The Large Powder Brush
First, reach for a large, fluffy powder brush. Its loosely packed bristles distribute translucent or setting powder evenly, preventing that heavy, cakey look. Instead of pressing hard, lightly dip, tap off excess, and sweep across the T-zone. For example, if your foundation tends to crease around the nose, use gentle circular motions there. (Less product almost always looks better in daylight.)
2. The Angled Blush/Contour Brush
Next, use an angled brush to hug the natural curve of your cheekbones. The slanted edge makes placement intuitive—simply align it with your cheekbone and blend upward toward the temple. This technique subtly lifts the face. If you’re contouring, start light and build gradually; harsh lines are harder to fix than soft ones.
3. The Fan Brush (Optional but Recommended)
Finally, a fan brush delivers a sheer sweep of highlighter across the high points of your cheeks. Alternatively, use it to flick away eyeshadow fallout without smudging foundation.
For a full routine guide, explore how to build a simple and effective daily beauty routine.
Beyond the Brushes: Non-Negotiable Makeup Accessories
Even in pro kits across New York fashion week prep rooms, artists swear by these unsung heroes—long before they reach for basic makeup tools.
-
Eyelash Curler: First, this is your eye-opener—literally. By lifting lashes at the root, it creates the illusion of larger, more awake eyes before mascara even enters the chat (yes, very “I woke up like this”). Counterargument: some say it crimps lashes. Only if you clamp carelessly. Use gentle pressure.
-
Precision Tweezers: Next, essential for brow shaping and applying falsies with surgical accuracy.
-
Pencil Sharpener: Finally, always use one designed for cosmetic pencils to ensure clean, precise lines.
Mastering Your Makeup Routine Starts Here
You came here wanting clarity on how to elevate your beauty routine with the right techniques and tools—and now you have a clear, practical path forward. From understanding product layering to refining application methods with essentials like foundation, concealer, mascara, blush, and lipstick, you’re better equipped to create a polished, confident look every time.
The frustration of makeup that doesn’t blend well, fades too quickly, or feels overwhelming is real. But with the right knowledge and a few core tools, that confusion turns into control. When you understand why products work and how to apply them correctly, your results become consistent and effortless.
Now it’s time to put this into action. Refresh your kit, practice the techniques you’ve learned, and focus on mastering the basics before adding complexity. If you want step-by-step beauty guidance trusted by thousands of readers who rely on expert-backed makeup and skincare insights, explore more of our in-depth tutorials and start transforming your routine today.