
Achieving a radiant, even complexion can feel overwhelming with so many products, tools, and techniques available. If you’re searching for a clear, step-by-step guide to flawless foundation application, this article is designed to give you exactly that. We break down the essential prep steps, formula selection tips, blending techniques, and common mistakes to avoid—so you can create a smooth, natural-looking base that lasts all day.
Our guidance is rooted in proven skincare science, professional makeup artistry standards, and insights gathered from experienced beauty specialists who understand how different skin types react to various formulations. Instead of trends that fade, we focus on methods that consistently deliver results.
By the end, you’ll understand how to choose the right foundation for your skin, prep your canvas properly, and apply your product with precision—so your makeup enhances your features without looking heavy or uneven.
Why your foundation looks cakey (and how to fix it for good)
Many people blame their formula, yet after three months of testing different bases, we found the real issue starts earlier. First, skin prep matters: dead cells and dehydration create texture that pigment clings to. Next, tools change everything; dense brushes can overload product, while damp sponges diffuse it. Finally, technique seals the deal—thin, layered passes beat one heavy swipe. Back in 2019, full-coverage glam dominated, but today’s second-skin trend rewards patience. Master these steps, and flawless foundation application becomes repeatable, not lucky. In other words, technique transforms everything.
The Canvas is Everything: Prepping Your Skin for a Flawless Base
Great makeup starts long before foundation touches your face. In other words, your prep determines whether your base melts in—or melts off.
Step 1: Cleanse Thoroughly
First and foremost, start with clean skin. Cleansing removes excess oil, sweat, and debris that cause foundation to separate and slide. When residue sits on your skin, pigment can’t properly adhere (think paint on a dusty wall). The benefit? Longer wear, smoother blending, and fewer midday touch-ups.
Step 2: Exfoliate (The Right Way)
Next, exfoliate—but strategically. Physical exfoliants use small particles to manually buff away dead cells, while chemical exfoliants use acids like AHAs or BHAs to dissolve buildup. Removing dead skin prevents patchiness and uneven texture. However, exfoliate 2–3 times a week—not right before application—to avoid sensitivity. The payoff is instantly smoother, more even-looking coverage.
Step 3: Hydrate and Moisturize
Hydration adds water to the skin; moisture seals it in with oils. When skin is both hydrated and moisturized, it looks plump and supple. As a result, foundation glides on instead of clinging to dry spots, giving you that coveted flawless foundation application.
Step 4: Prime with a Purpose
Finally, choose primer intentionally. Hydrating primers suit dry skin, mattifying formulas control oil, pore-filling options blur texture, and illuminating primers boost radiance. The right match enhances wear, refines texture, and elevates your entire look.
Choosing Your Weapon: The Ultimate Guide to Foundation Tools
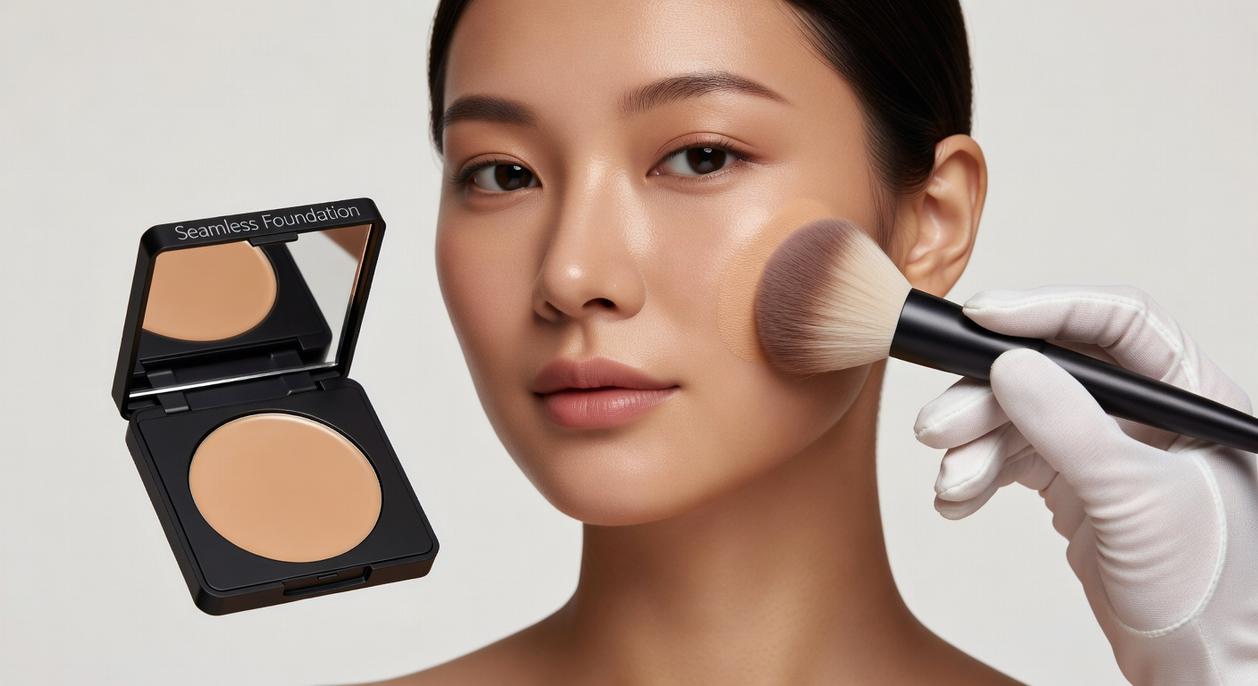
When it comes to foundation, your tool is your co-star. (Think Batman and Robin—but for your base.) The right choice can mean the difference between cakey and camera-ready.
The Makeup Sponge
A makeup sponge—like the iconic Beautyblender—is your go-to for a natural, dewy finish. The trick? Use it damp. Water expands the sponge so it absorbs less product and helps sheer it out for a lighter look. Instead of dragging, use a stippling (or bouncing) motion to press pigment into the skin. This technique diffuses edges and creates that soft-focus glow we associate with red-carpet selfies.
Foundation Brushes: Kabuki vs. Paddle
Next, brushes. A dense kabuki brush buffs foundation in circular motions for fuller coverage—great when you want glam worthy of a music video close-up. A flat paddle brush, on the other hand, “paints” product on using downward strokes for precise, controlled placement.
Your Fingertips
Sometimes, your best tool is already attached to you. Fingertips warm cream or serum formulas, helping them melt seamlessly into skin for sheer coverage and flawless foundation application.
Finally, clean your tools regularly. Dirty brushes harbor bacteria that can trigger breakouts and ruin blending. (Pro tip: Wash weekly to keep skin clear.) For sculpted results after base, see how to master contouring and highlighting for different face shapes.
The Art of Application: A Step-by-Step Blending Method
A great base isn’t about using more product—it’s about using it strategically. Mastering this method means less cakiness, longer wear, and that smooth, skin-like finish everyone compliments (yes, even in unforgiving daylight).
Less Is More
Start with a small amount of foundation on the back of your hand. Think pea-sized, not pancake-sized. It’s always easier to add than subtract—because once product settles into pores and fine lines, removing it without starting over is nearly impossible. This approach prevents that heavy, mask-like effect and keeps your skin looking like skin.
Benefit: You maintain control from the first step, which means fewer touch-ups and less wasted product.
Dotting Technique
Using your finger, brush, or sponge, lightly dot foundation onto the center of your face:
- Forehead
- Nose
- Cheeks
- Chin
These areas typically need more coverage due to redness or uneven tone. By concentrating product here, you avoid overloading the perimeter of your face.
What’s in it for you? Natural dimension. Your face keeps its structure instead of looking flat (think real life, not a wax figure).
Blend Outwards
This is the core principle: blend from the center outward toward the hairline and jawline. The highest coverage stays where you need it, while the edges fade seamlessly.
This single habit dramatically increases your chances of a flawless foundation application.
The Stipple, Buff, and Press Method
Your tool changes your finish:
- Stipple (bounce) with a damp sponge for an airbrushed look.
- Buff (small circles) with a dense kabuki brush for fuller coverage.
- Press with your fingers to melt product into the skin for a natural glow.
Each technique improves longevity and texture—choose based on your desired finish.
Don’t Forget the Edges
Blend down the jawline and slightly onto the neck. Soften around the ears and into the hairline. These final touches eliminate harsh lines and create a seamless transition.
The payoff? Confidence. No visible borders. Just polished, even-toned skin that looks effortless (even if you know the artistry behind it).
Powder and spray both set makeup, but they do different jobs. Translucent powder absorbs oil and mattifies—think blotting paper in cosmetic form. Setting spray melts layers together and boosts wear time. Many tutorials miss this chemistry: powders rely on starches or silica to control sebum, while sprays use polymers to form a flexible film (a lightweight raincoat for your face).
Skip the all-over dusting. Use a fluffy brush to target only the T-zone.
Finish with a mist for the final melt, erasing chalkiness and locking in flawless foundation application for hours. Your skin should look like skin, period. Trust this.
Here’s the hard truth: a cakey finish isn’t your foundation betraying you—it’s a process problem. I learned that the expensive way, layering product over dry skin and blaming the bottle. The real fix? Prep. Tool. Technique. Skip moisturizer, use the wrong brush, rush blending—and even luxury formulas look heavy.
When I slowed down, hydrated properly, and pressed (not dragged) product in, everything changed. The goal isn’t more makeup; it’s method. Flawless foundation application comes from intention, not impulse.
Try one tip from this guide during your next routine. Small shifts create big results—sometimes overnight. Master it once, benefit forever. Seriously.
Mastering Flawless Foundation Application
You came here because achieving flawless foundation application can feel frustrating. Uneven texture, patchiness, cakiness, or makeup that fades too quickly can make even the best products disappointing. Now you understand the techniques, tools, and skin-prep essentials that transform your base from average to airbrushed.
When you apply foundation with the right prep, proper blending methods, and formulas suited to your skin type, everything changes. Your makeup lasts longer. Your skin looks smoother. Your confidence shows.
But knowing the steps is only half the battle. Consistency and the right guidance make all the difference.
If you’re tired of foundation that never looks quite right, it’s time to upgrade your routine. Explore our expert-backed beauty guides and step-by-step tutorials designed to solve real makeup struggles. Thousands of readers trust our proven techniques to perfect their look—now it’s your turn. Start refining your routine today and finally achieve the smooth, radiant finish you’ve been aiming for.